Nikon D7200 Instruction Manual: A Comprehensive Guide
Welcome! This manual provides a detailed overview‚ assisting you in maximizing your Nikon D7200’s capabilities for stunning photography and videography experiences.
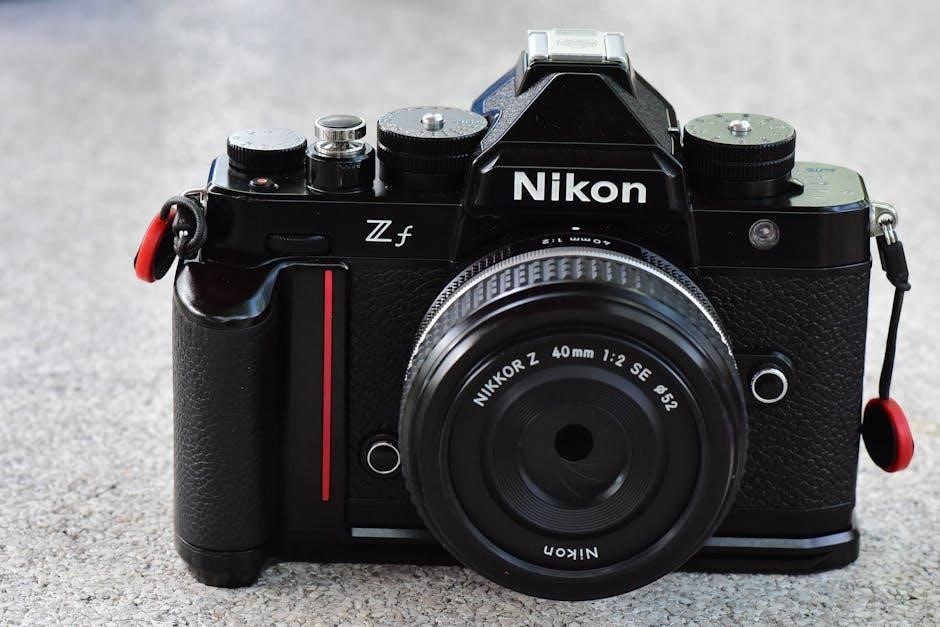
Congratulations on choosing the Nikon D7200‚ a powerful and versatile DSLR designed for both amateur and professional photographers. This camera boasts a 24.2-megapixel DX-format CMOS sensor‚ delivering exceptional image quality and detail.
This guide will walk you through every aspect of your new camera‚ from initial setup and understanding its controls to mastering advanced shooting techniques. Prepare to unlock your creative potential and capture breathtaking images with the Nikon D7200!
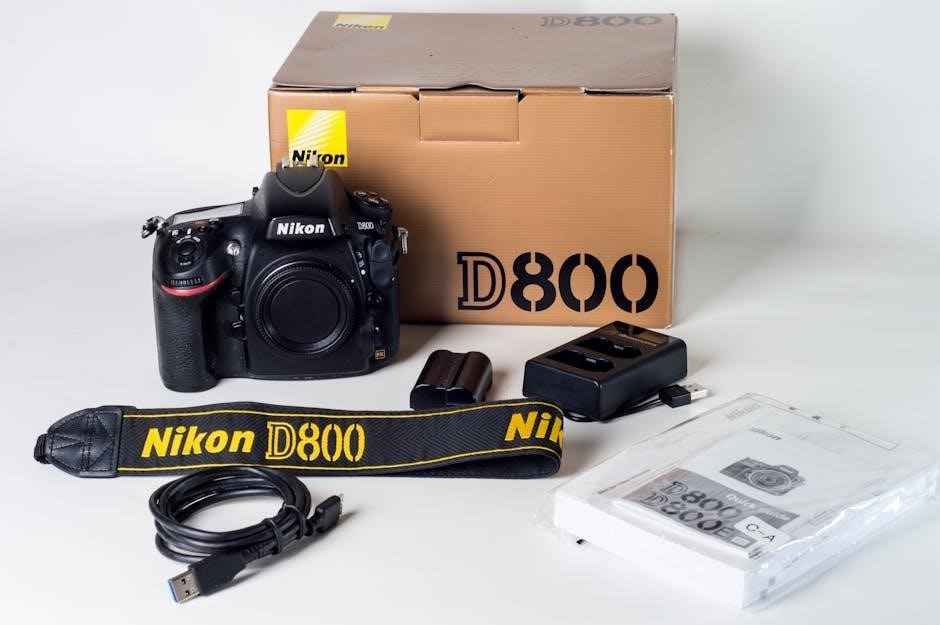
Unboxing and Initial Setup
Carefully unpack your Nikon D7200‚ ensuring all included accessories are present: camera body‚ battery‚ battery charger‚ strap‚ USB cable‚ and documentation. Insert the battery and memory card. Connect the camera to a power source to charge the battery fully before first use.
Set the language‚ date‚ and time. Follow the on-screen prompts to configure initial settings‚ optimizing the camera for your shooting preferences. Now you’re ready to begin!
Understanding the Camera Body & Controls
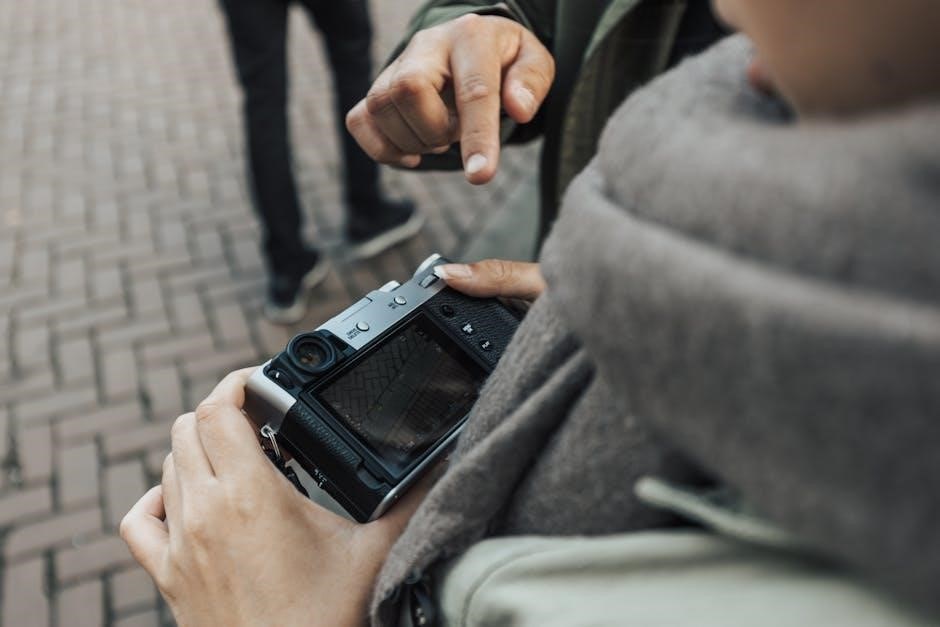
Familiarize yourself with the D7200’s ergonomic design. Key components include the mode dial‚ shutter button‚ control dials‚ and directional pad. The camera body houses essential ports for connectivity‚ like USB and HDMI. Understanding the placement and function of each control is crucial for efficient operation.
Explore the built-in flash and viewfinder for optimal image composition and review. Practice locating frequently used settings for quick adjustments during shooting.
Front and Rear Panel Overview
The front panel features the lens mount‚ autofocus-assist illuminator‚ and function button. On the rear‚ you’ll find the LCD screen‚ directional buttons‚ menu button‚ and playback controls. Locate the memory card slot and battery compartment.
Understand the purpose of each button and dial for seamless operation. The rear panel also houses the Live View button and diopter adjustment dial for viewfinder clarity.
Top Panel Controls and Functions
The top panel houses essential controls: the mode dial (Auto‚ P‚ S‚ A‚ M‚ Scene modes)‚ shutter release button‚ and main command dial. Find the ISO button and exposure compensation dial for quick adjustments.
The on/off switch surrounds the shutter button. Familiarize yourself with these controls for efficient shooting. The microphone and hot shoe are also located on the top panel‚ enabling external audio and flash options.
Menu System Navigation
Accessing the menu is done via the ‘MENU’ button. The D7200’s menu is logically organized into several tabs: Shooting‚ Custom Setting‚ Setup‚ and Retouch. Use the multi-selector and command dials to navigate.
Each menu offers extensive customization options. The ‘Setup’ menu controls camera settings like date/time and LCD display. Mastering menu navigation unlocks the camera’s full potential‚ allowing personalized control.
Shooting Menu Options
The Shooting Menu houses vital settings for image capture; Key options include image quality (RAW‚ JPEG)‚ ISO sensitivity‚ white balance‚ and autofocus settings. Explore metering modes (Matrix‚ Center-weighted‚ Spot) for precise exposure.
Adjust Active D-Lighting for detail in highlights and shadows. Flash control settings are also found here. Familiarize yourself with these options to tailor shooting to various conditions and creative visions.
Custom Setting Menu Explained
The Custom Setting Menu allows personalized camera behavior. Configure controls like shutter-release button‚ focus lock‚ and AE/AF lock. Adjust display settings‚ including viewfinder and LCD information. Fine-tune autofocus behavior and metering options to match your shooting style.
Customize button functions for quick access to frequently used features. Saving these settings creates a tailored shooting experience‚ boosting efficiency and creative control.
Focusing Modes and Techniques

Achieving sharp images relies on mastering the D7200’s focusing system. Explore Single-area AF for stationary subjects‚ Continuous-area AF for tracking moving objects‚ and Dynamic-area AF offering a balance of both.
Learn to select focus points strategically for precise targeting. Manual focus provides ultimate control‚ especially in challenging lighting or with macro photography. Practice these techniques for consistently sharp results.
Autofocus Modes: Single‚ Continuous‚ Dynamic Area
Single-area AF is ideal for static subjects; the camera focuses once when the shutter button is half-pressed. Continuous-area AF tracks moving subjects‚ constantly adjusting focus. Dynamic-area AF combines both – maintaining focus on the selected point while seamlessly switching to surrounding points if the subject moves.
Experiment with these modes to match your shooting scenario‚ ensuring consistently sharp images‚ whether capturing portraits or fast-action sports.
Manual Focus Operation
Manual focus grants precise control over sharpness‚ crucial for challenging situations where autofocus struggles – like low light or macro photography. Switch the focus mode on the camera body or lens to ‘M’. Rotate the focusing ring on the lens until your subject appears sharp in the viewfinder or Live View.
Utilize focus peaking (if enabled) for visual aid‚ highlighting in-focus areas. Practice for consistently accurate manual focusing!
Exposure Control: Aperture‚ Shutter Speed‚ ISO
Mastering exposure is key to photographic success. Aperture controls depth of field‚ shutter speed dictates motion blur‚ and ISO determines sensitivity to light. These three elements work together to create a properly exposed image.
Understanding their interplay allows creative control. Experiment with different settings to achieve desired effects – shallow depth of field‚ frozen action‚ or low-light performance.
Aperture Priority Mode (A or Av)
Aperture Priority (A or Av) mode lets you select the f-stop‚ controlling depth of field. The camera automatically sets the shutter speed for proper exposure. This is ideal for portraits (shallow depth) or landscapes (large depth).
Experiment with different f-numbers to see how they affect your images. Remember‚ lower f-numbers mean shallower depth of field and more light‚ while higher numbers do the opposite.
Shutter Priority Mode (S or Tv)
Shutter Priority (S or Tv) mode allows you to choose the shutter speed‚ controlling motion blur. The camera automatically adjusts the aperture for correct exposure. Use fast shutter speeds to freeze action‚ like sports‚ or slow speeds for intentional motion blur‚ like waterfalls.
Be mindful of the aperture value the camera selects; adjust ISO if needed to maintain a good exposure.
Manual Mode (M)
Manual Mode (M) grants full creative control‚ letting you independently set both aperture and shutter speed. This is ideal for challenging lighting situations or when you desire a specific look. Use the camera’s light meter as a guide‚ adjusting settings until the indicator reaches the center.
Mastering Manual mode unlocks your photographic vision‚ offering unparalleled flexibility.
Shooting Modes: Beyond Auto

Beyond Auto‚ the D7200 offers a range of shooting modes to simplify complex scenarios. Scene Modes like Portrait‚ Landscape‚ and Sports optimize settings for specific subjects. Effects Mode provides creative filters – think High Contrast Monochrome or Selective Color – for instant artistic flair.
Experiment with these modes to quickly achieve desired results and expand your creative toolkit.

Scene Modes: Portrait‚ Landscape‚ Sports
Scene Modes automate settings for common shooting situations. Portrait mode softens backgrounds for flattering subject isolation. Landscape mode maximizes depth of field‚ ensuring sharp detail from foreground to background. Sports mode utilizes faster shutter speeds to freeze action‚ capturing dynamic moments with clarity.
These presets are ideal for beginners and quick shooting scenarios.
Effects Mode: Creative Filters
Effects Mode offers a range of artistic filters to instantly transform your images. Explore options like Standard‚ Vivid‚ Neutral‚ Portrait‚ Landscape‚ and Flat for varied color rendering. Further creative choices include Monochrome‚ Sepia‚ and various Picture Styles.
Experiment with these filters to achieve unique and personalized photographic looks directly within the camera.
Image Quality Settings & File Formats
Image Quality settings determine the level of detail and compression in your photos. Choose from RAW for maximum editing flexibility‚ or JPEG for smaller file sizes and immediate sharing. Adjust Image Size (Large‚ Medium‚ Small) and Compression (Fine‚ Normal‚ Basic) to balance quality and storage space.
Understanding these options is crucial for optimal results.
RAW vs. JPEG: Understanding the Differences
RAW files are unprocessed data directly from the sensor‚ offering extensive editing control over white balance‚ exposure‚ and detail. They require post-processing software. JPEG files are compressed and ready to use‚ but with limited editing latitude.
RAW provides superior quality and flexibility‚ while JPEG prioritizes convenience and smaller file sizes. Choose based on your workflow and editing needs.
Image Size and Compression Options
The D7200 offers various image size options‚ from large (24.2MP) to small‚ impacting file size and detail. Large is ideal for prints and cropping‚ while Small conserves storage.
Compression settings include Fine (high quality‚ larger files)‚ Normal (balanced quality and size)‚ and Basic (lower quality‚ smallest files). Select based on intended use and storage capacity.
Working with Lenses: Compatibility & Features
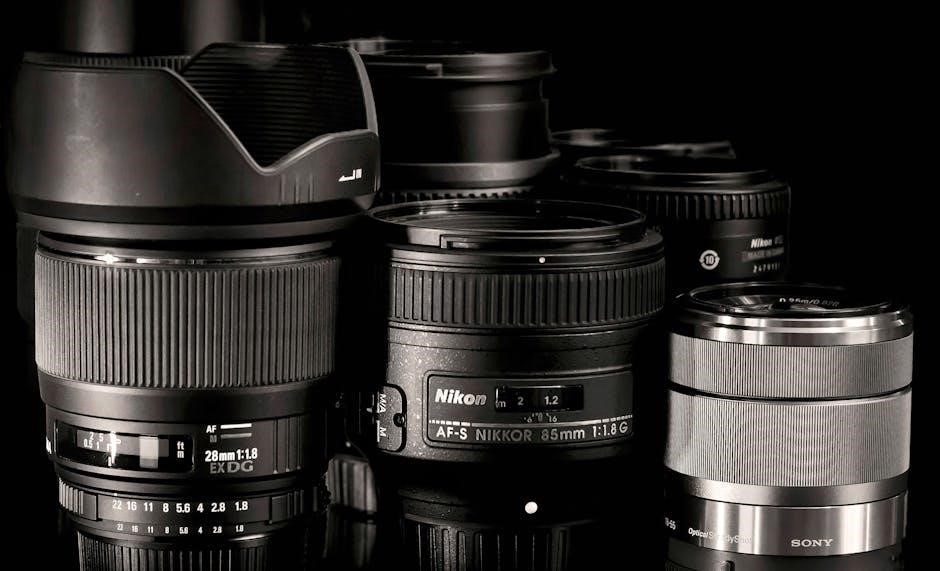
The Nikon D7200 utilizes the Nikon F-mount‚ ensuring compatibility with a vast range of Nikon F-mount lenses‚ both older and newer designs. This provides flexibility for various photographic needs.
Many Nikon lenses feature VR (Vibration Reduction) technology‚ minimizing blur caused by camera shake‚ especially useful in low light or with longer focal lengths. Check lens specifications for VR compatibility.
Nikon F-Mount Lenses
The Nikon F-mount has a long and celebrated history‚ offering a diverse selection of lenses. The D7200 seamlessly supports both Nikon’s older AI and AI-S lenses‚ alongside current AF-S and AF-P lenses.
This broad compatibility allows photographers to utilize existing lens collections or explore a wide array of new options‚ catering to diverse photographic styles and budgets. Explore Nikon’s extensive lens lineup!
VR (Vibration Reduction) Technology
Vibration Reduction (VR) is a crucial feature for achieving sharp images‚ especially in low-light conditions or when using longer focal length lenses. Nikon’s VR technology minimizes camera shake‚ allowing for slower shutter speeds without blurring.
The D7200 benefits from VR lenses‚ offering up to 4 stops of stabilization. This significantly improves handheld shooting capabilities‚ resulting in clearer‚ more detailed photographs and smoother videos.
Using the Built-in Flash
The Nikon D7200’s built-in flash offers versatile lighting options for various shooting scenarios. It’s ideal for filling shadows‚ adding light in dimly lit environments‚ or freezing motion. Explore different flash modes like Auto‚ Fill-Flash‚ and Red-Eye Reduction to optimize your results.
Flash Compensation allows fine-tuning the flash output‚ preventing over or underexposure. Mastering these settings enhances image quality and creative control.
Flash Modes: Auto‚ Fill-Flash‚ Red-Eye Reduction
Auto Flash mode lets the D7200 determine when flash is needed‚ simplifying shooting in varied lighting. Fill-Flash adds light even in bright conditions‚ balancing exposure and reducing harsh shadows. Red-Eye Reduction emits a pre-flash to constrict pupils‚ minimizing the red-eye effect in portraits.
Experiment with each mode to understand their impact on your images‚ achieving optimal results for different subjects and environments.
Flash Compensation
Flash Compensation allows fine-tuning of flash output‚ expressed in EV (Exposure Value) steps. Positive values increase flash power‚ brightening the image‚ while negative values decrease it‚ darkening the image. This is crucial for achieving proper exposure when the automatic flash setting isn’t ideal.
Use this feature to correct over or underexposed flash photos‚ ensuring balanced and natural-looking results in various shooting scenarios.
Video Recording with the D7200
The Nikon D7200 excels in video‚ offering Full HD 1920×1080 recording at selectable frame rates – 24p‚ 25p‚ 30p‚ 50p‚ and 60p. These options provide creative control over motion blur and playback smoothness.
Access video settings through the Live View shooting mode. Explore options for audio levels‚ microphone input‚ and movie exposure settings for professional-quality video capture.
Video Resolution and Frame Rates
The D7200 supports Full HD video recording at 1920×1080 resolution. Frame rate choices significantly impact video appearance; 24p delivers a cinematic look‚ while 30p is standard for television.
Higher frame rates like 50p and 60p create smoother motion‚ ideal for sports or fast-action sequences. Experiment with these settings to achieve your desired visual style and ensure optimal playback compatibility.
Audio Recording Options
The Nikon D7200 features a built-in microphone for basic audio capture during video recording. However‚ for superior sound quality‚ an external microphone is highly recommended. You can connect microphones via the 3.5mm microphone jack.
Adjustable audio levels are crucial; monitor levels to prevent clipping or excessively quiet recordings. Wind noise reduction is also available‚ enhancing clarity in outdoor environments.
Connectivity: Wi-Fi and USB
The Nikon D7200 offers versatile connectivity options. Utilize the optional Wireless Mobile Adapter (WMU) for Wi-Fi transfer to smartphones and tablets‚ enabling remote control and instant image sharing. Alternatively‚ a standard USB port facilitates direct connection to computers.
USB connectivity allows for rapid image transfer and camera control via compatible software. Ensure you have the necessary drivers installed for optimal performance and seamless data exchange.
Wireless Mobile Adapter (WMU) Setup
To connect via the Wireless Mobile Adapter (WMU)‚ first‚ ensure it’s properly inserted into the camera’s accessory terminal. Power on the WMU and select your network from the camera’s setup menu. Enter the Wi-Fi password when prompted.
Download the Nikon Wireless Mobile Utility app on your smartphone or tablet. Follow the in-app instructions to pair your device with the camera‚ enabling wireless image transfer and remote control functionality.
Transferring Images to a Computer
Connect your Nikon D7200 to your computer using the supplied USB cable. Power on the camera and select “USB” as the connection type in the camera’s menu. Your computer should recognize the camera as a removable drive.
Alternatively‚ use a card reader for faster transfer speeds. Simply insert your SD card into the reader and connect it to your computer. Copy and paste your desired images from the card to your computer’s storage.
Customizing Your D7200
Personalize your Nikon D7200 to match your shooting style! Explore the Custom Function settings to assign specific operations to buttons‚ streamlining your workflow. Utilize the My Menu options to create a personalized menu with your frequently used settings for quick access.
These customizations enhance efficiency and allow you to react swiftly to changing photographic opportunities‚ making the camera truly your own.
Custom Function Settings
Customize your D7200’s operation with Custom Functions! These settings allow you to assign specific actions to camera buttons and controls. For example‚ change the AE-L/AF-L button function or customize the behavior of the control dials.
Experiment with these options to tailor the camera to your shooting preferences‚ improving speed and efficiency during critical moments. Explore each function carefully to unlock the D7200’s full potential.
My Menu Options
Personalize your Nikon D7200 experience with My Menu! This feature lets you create a customized menu containing frequently used settings. Add items from any of the camera’s menus for quick and easy access.
Organize settings to match your workflow‚ saving valuable time in the field. My Menu streamlines adjustments‚ ensuring you never miss a shot while searching through complex menu structures – a truly efficient feature!
Troubleshooting Common Issues
Encountering problems? This section addresses frequent Nikon D7200 issues. Common concerns include error messages (like “No memory card”)‚ battery drain‚ and autofocus difficulties. We’ll provide clear solutions and diagnostic steps.
Refer to the error code list for specific explanations. Optimize battery life by disabling live view when unnecessary. If autofocus fails‚ check lens compatibility and focusing modes – ensuring smooth operation!
Error Messages and Solutions
Decoding camera alerts! The Nikon D7200 displays error messages to indicate problems. “Err” often signals internal issues – try resetting the camera. “No memory card” requires card insertion or formatting. “Lens not attached” demands secure lens mounting.
Consult the full error code list in the manual for detailed explanations and troubleshooting steps. Regularly updating firmware can also resolve certain error occurrences‚ ensuring optimal performance.
Battery Life and Power Management
Maximize shooting time! The D7200’s battery life varies with usage. Minimize drain by disabling Live View when not needed‚ utilizing the viewfinder‚ and reducing LCD brightness.
Enable auto power-off features and carry a spare‚ fully charged battery for extended shoots. Avoid extreme temperatures‚ as they impact battery performance. Use the provided charger for optimal charging and longevity.
Maintenance and Care
Protect your investment! Regularly clean the camera body with a soft‚ dry cloth. Avoid harsh chemicals or abrasive cleaners. Store the D7200 in a dry‚ dust-free environment‚ ideally in a camera bag.
Periodic sensor cleaning is crucial; use a blower or sensor cleaning kit cautiously. Proper care ensures optimal performance and extends the lifespan of your Nikon D7200.
Cleaning the Sensor
Dust removal is key! Use the built-in sensor cleaning function first. If persistent dust remains‚ employ a blower to gently dislodge particles. For stubborn spots‚ consider a sensor cleaning kit – proceed with extreme caution!
Improper cleaning can damage the sensor. Always follow kit instructions carefully and avoid touching the sensor surface directly. Professional cleaning is recommended for complex issues.
Storing Your Camera
Proper storage protects your investment! Always remove the battery when storing the D7200 for extended periods. Keep it in a cool‚ dry place‚ ideally within its original camera bag. Avoid extreme temperatures and humidity.
Store lenses separately‚ also in a dry environment. Consider using silica gel packets to absorb moisture. Regular use will prolong the camera’s lifespan and maintain optimal performance.