Crumb quilting is a fantastic way to utilize fabric scraps, creating textured quilts with a unique, randomized aesthetic․
Missouri Star offers helpful video tutorials, while Crafty Staci’s project is a great starting point for beginners․
Reddit’s r/quilting community provides inspiration and support for your first crumb quilt journey, embracing the scrappy charm!
What is a Crumb Quilt?
Crumb quilts are delightfully scrappy creations born from utilizing even the smallest fabric remnants – those “crumbs” often too tiny for other projects․
The technique involves piecing these irregular bits onto a foundation piece, building up a textured surface with a wonderfully random appearance․
Unlike traditional quilting with precise shapes, crumb quilting embraces imperfection and celebrates the beauty of repurposed materials․
It’s a fantastic introduction to quilting, as highlighted by Crafty Staci, allowing for easy creation of unique, textured surfaces․
Essentially, it’s a liberating and resourceful way to transform scraps into a cozy and visually interesting quilt!
The Appeal of Scrap Quilting
Scrap quilting, particularly with the crumb technique, holds immense appeal for quilters seeking resourcefulness and creative freedom․ It’s a deeply satisfying way to minimize fabric waste, transforming leftover pieces into something beautiful and functional․
The randomized nature of crumb quilts fosters a unique aesthetic, avoiding rigid patterns and embracing a more organic look․
Many find it “fun,” as expressed on Reddit’s r/quilting, and a perfect project for a first finished quilt․
It’s also a budget-friendly option, relying on materials already on hand, and allows for endless design possibilities!
Historical Context of Crumb Quilts
Crumb quilts, while experiencing a modern resurgence, have roots in the resourceful traditions of earlier quilters․ Historically, quilters often utilized every scrap of fabric, driven by necessity and a desire to avoid waste․
While pinpointing a precise origin is difficult, the practice aligns with the broader history of scrap quilts and utilitarian quilting styles․
The modern revival, fueled by online communities like r/quilting, celebrates this heritage, offering a contemporary take on a time-honored technique․
It’s a testament to the enduring appeal of making something beautiful from seemingly insignificant pieces․

Gathering Your Materials
Successful crumb quilting begins with a curated collection of fabric scraps, a suitable background fabric, and essential tools like a rotary cutter and mat․
Preparation is key!
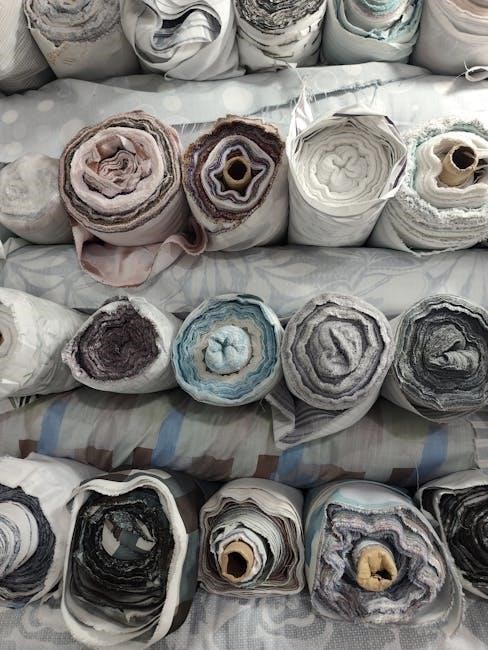
Fabric Scrap Selection
Choosing your scraps is a delightful part of the process! Embrace variety in color, pattern, and fabric type – cottons work wonderfully, but don’t be afraid to experiment․
A Rose Tinted World suggests sorting scraps by color before you begin, ensuring a more random, yet balanced, distribution within each block․
Remember the Reddit quilter’s advice: avoid solid black fabrics and use patterned whites sparingly for optimal visual texture and a charming, cohesive look․
The more diverse your stash, the more unique your crumb quilt will become!
Choosing Background Fabric
Selecting a background fabric is crucial for making your crumb blocks ‘pop’! Consider a neutral tone – think soft creams, grays, or light blues – to allow the colorful crumbs to take center stage․
The background should provide sufficient contrast without competing with the scrappy design․
A simple, non-patterned fabric is generally best, as busy backgrounds can overwhelm the texture created by the crumbs․
Think of it as a canvas for your colorful, scrappy masterpiece!
Essential Tools for Crumb Quilting
To embark on your crumb quilting adventure, gather a few key tools! A rotary cutter and mat are vital for precise fabric cutting, ensuring clean ‘crumb’ shapes․ You’ll also need a ruler for accurate measurements and a straight-edged foundation piece – any scrap fabric will do!
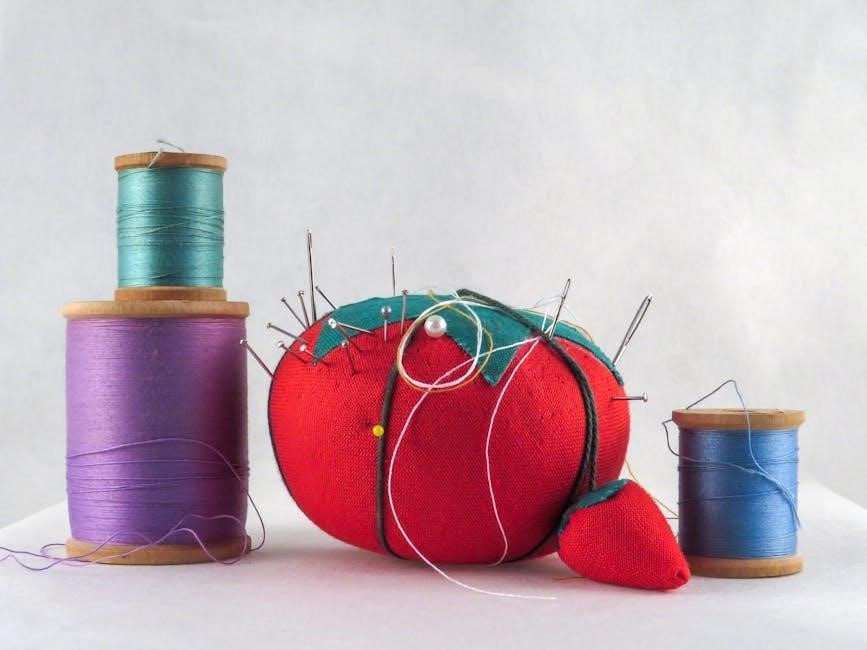
A sewing machine, naturally, is essential, along with a standard sewing kit including pins, needles, and thread․
Ironing is key for a flat quilt top, so have an iron and ironing board readily available․
Preparing Your Fabric Scraps
Begin by sorting scraps by color for a more randomized, yet balanced, distribution within each block․ Cut these into small, irregular “crumb” shapes for piecing․
This initial step sets the stage for a beautifully textured quilt!
Sorting Scraps by Color
Sorting fabric scraps by color is a crucial first step in preparing for your crumb quilt․ While randomness is key to the crumb quilt aesthetic, pre-sorting prevents any single color from dominating a block․
A Rose Tinted World suggests this method ensures a more even distribution of color and pattern, enhancing the visual appeal of the finished quilt․
Separate your scraps into general color families – reds, blues, greens, yellows, neutrals, and so on․
Further subdivide if desired, but avoid getting overly precise; the goal is organized chaos!
Cutting Fabric into “Crumbs”
The term “crumbs” refers to the small, irregularly shaped pieces of fabric used in this quilting technique․ There isn’t a strict size requirement, but generally, pieces range from 1” to 3” on each side․
Focus on creating a variety of shapes and sizes to maximize the textured, scrappy look․
Don’t worry about perfect squares or rectangles; the more organic the shapes, the better!
This freeform approach is what gives crumb quilts their distinctive charm and allows for creative fabric usage․
Using a Rotary Cutter and Mat
A rotary cutter, mat, and ruler are incredibly helpful for efficiently cutting fabric into crumbs, though scissors work too․ Ensure your rotary cutter blade is sharp for clean cuts and safety․
Place the fabric on the cutting mat and use the ruler as a guide to cut strips, then rotate and cut again․
Don’t aim for precision; embrace the irregular shapes!
A self-healing mat protects your work surface and extends blade life․ Prioritize safety by always using a cutting glove․

Constructing the Crumb Blocks
Piecing crumbs onto a foundation piece – a straight-edged scrap – is key․ Build blocks gradually, focusing on random color and pattern distribution for texture;
Finding a Straight-Edged Foundation Piece
Locating a foundation piece is the initial step in constructing crumb blocks․ A Rose Tinted World suggests utilizing a long scrap of fabric possessing a perfectly straight edge․ This foundation serves as the base upon which you’ll adhere the “crumbs” – your small fabric pieces․
The size of this foundation isn’t critical initially; it simply needs that straight edge for accurate piecing․ Don’t overthink it! Any scrap fabric will work, as long as it provides a reliable starting point for building your crumb creation․ It’s a foundational element, literally!
Piecing the Crumbs onto the Foundation
Begin attaching your pre-cut fabric “crumbs” to the straight-edged foundation piece․ Overlap the crumbs slightly, varying their placement for a truly random look․ A Rose Tinted World emphasizes sorting scraps by color beforehand to achieve a more balanced, yet still randomized, color distribution within each block․
Continue adding crumbs, building outwards from the foundation, until the desired block size is reached․ There’s no strict rule – embrace the improvisational nature of crumb quilting! The goal is a textured, scrappy surface․
Building Block Size and Consistency
While crumb quilting thrives on randomness, maintaining some consistency in block size is crucial for a cohesive final quilt․ Determine your desired finished block dimensions before you start piecing․ Don’t obsess over perfect uniformity; slight variations add to the charm!
Focus on creating blocks that are relatively similar in size and shape․ This will simplify the joining process later on․ Remember, the beauty lies in the controlled chaos of the crumb technique, not rigid perfection․
Quilting Techniques for Crumb Quilts
Quilting crumb quilts can be done with straight lines or free-motion designs, enhancing the texture; Consider designs that complement the random crumb pattern!
Straight-Line Quilting
Straight-line quilting is an excellent choice for crumb quilts, offering a modern and clean aesthetic that beautifully contrasts with the organic, scrappy nature of the blocks․
Using a walking foot is highly recommended to ensure even fabric feed, preventing puckering and maintaining consistent stitch length across the varied crumb layers․
Consider quilting lines parallel to the block edges, diagonally, or even in a grid pattern․ The simplicity of straight lines allows the texture of the crumbs to truly shine, creating a visually appealing and tactile finish․
Experiment with different spacing to achieve your desired look!
Free-Motion Quilting Options
Free-motion quilting unlocks creative possibilities for crumb quilts, allowing for organic designs that complement the scrappy aesthetic;
Gentle meandering, stippling, or simple loops work wonderfully, enhancing the texture without overwhelming the crumb details․
Lowering the feed dogs on your sewing machine is crucial for free-motion control, enabling you to move the quilt freely under the needle․
Practice on a sample quilt sandwich first to build confidence and refine your technique․ Embrace imperfections – they add to the charm!
Quilting Designs to Enhance Texture
Quilting designs significantly impact a crumb quilt’s overall texture and visual appeal․ Straight-line quilting, spaced closely together, creates a modern, grid-like effect, contrasting with the randomness of the crumbs․
Echo quilting around individual crumb blocks highlights their unique shapes and adds subtle dimension․
Consider using a walking foot for even stitch distribution, especially with the varying thicknesses of fabric scraps․
Experiment with different thread colors to either blend or intentionally contrast with the crumb fabrics, further enhancing the textural play․
Crumb Quilt Patterns & Designs
Crumb quilt designs range from simple block layouts to more complex arrangements, easily customized with borders․
Beginners can start with basic blocks, gradually exploring intricate patterns as skills develop․
Embrace creativity!
Simple Block Layouts
For beginners, simple block layouts are the perfect introduction to crumb quilting․ Start with a basic grid, arranging crumb blocks in a straightforward manner – think four-patch or nine-patch designs․
These layouts minimize complexity, allowing you to focus on mastering the crumb piecing technique itself․
Focus on consistent block sizes for easier assembly․
Don’t be afraid to experiment with different arrangements of the blocks, even within a simple grid, to create visual interest․
Remember, the beauty of crumb quilting lies in its randomness, so slight variations are perfectly acceptable and add to the charm!
More Complex Block Arrangements
Once comfortable with simple layouts, explore more complex arrangements for a dynamic crumb quilt․ Consider designs like star blocks, pinwheel patterns, or even variations of the classic log cabin․
These arrangements require careful planning and precise piecing, but the results are visually stunning․
Experiment with offsetting crumb blocks or incorporating larger, more defined crumb clusters within the design․
Don’t hesitate to sketch out your ideas before you begin, ensuring a cohesive and balanced final product․
Embrace the challenge and enjoy the creative process!
Using Borders to Frame the Crumb Blocks
Adding borders is a fantastic way to define and enhance your crumb quilt․ A simple solid-colored border provides a clean, contrasting frame, allowing the textured crumb blocks to truly shine․
Consider varying the width of the border to create different visual effects․
Alternatively, explore pieced borders using coordinating fabrics for a more intricate look․
Borders also offer an opportunity to square up the quilt top, ensuring straight edges before binding․
They can really pull the whole design together!
Joining the Blocks Together
Accurate seam allowances are crucial for a successful crumb quilt․ Pressing seams flat and squaring up the quilt top ensures a cohesive, well-aligned final product․
Accurate Seam Allowances
Maintaining consistent seam allowances is paramount when joining crumb blocks, as the irregular edges can easily lead to misalignment․ A standard ¼ inch seam allowance is generally recommended for crumb quilts, ensuring blocks fit together snugly․
Carefully pin the blocks, paying close attention to matching edges, and stitch slowly to avoid shifting the fabric․ Precision here minimizes bulk and creates a flatter quilt top․ Consistent seams are the foundation for a beautifully constructed crumb quilt, preventing frustrating issues during the finishing stages․
Double-check your seam allowances throughout the process!
Pressing for a Flat Quilt Top
Pressing, not ironing, is crucial after joining crumb blocks․ Ironing can distort the fabric and seams, while pressing gently sets the stitches without altering the shape․ Press seams open or to one side, maintaining consistency throughout the quilt․
A design wall can be incredibly helpful for visualizing the layout and identifying any puckering or unevenness before final pressing․ Careful pressing minimizes bulk and ensures a flat, even quilt top, making the quilting process significantly easier and yielding a professional finish․
Take your time and press carefully!
Squaring Up the Quilt Top
Squaring up is essential for a professional-looking crumb quilt․ After pressing, use a large rotary cutter and quilting ruler to trim away any uneven edges, ensuring all sides are perfectly straight and at right angles․
This step corrects any distortions that may have occurred during piecing and pressing, guaranteeing a smooth quilting experience․ Accurate squaring prevents puckering and ensures the layers align correctly․ Double-check measurements before each cut!
A well-squared quilt top is the foundation for a beautiful finished quilt․
Finishing Your Crumb Quilt
Finishing touches involve layering your quilt with batting and backing, then binding the edges for a polished look․
Don’t forget to add a label commemorating your creation!
Layering the Quilt
Preparing for quilting begins with layering! First, lay your backing fabric right-side down, smoothing out any wrinkles․ Next, carefully position your quilt top right-side up on top of the backing․
Then, add your batting – cotton, polyester, or a blend – centering it over the quilt top and backing․
Basting is crucial to hold these layers together; you can use safety pins, basting spray, or hand-basting stitches․
Ensure a smooth, flat surface before proceeding to the quilting stage, preventing puckering and ensuring even stitches․
Binding Techniques
Securing the edges is achieved through binding! Cut strips of fabric (typically 2․5 inches wide) and join them to create a long binding strip․ Fold the strip in half lengthwise, wrong sides together, and press․
Attach the binding to the quilt’s edge, raw edges aligned, using a ¼-inch seam allowance․
Miter the corners for a neat finish․
Finally, hand-stitch or machine-stitch the binding to the back of the quilt, creating a polished and durable edge that beautifully frames your crumb quilt․
Adding a Label
A quilt label is a lasting keepsake! Cut a piece of fabric (cotton is ideal) and personalize it with details like the quilt’s name, your name, the date of completion, and any special occasion it commemorates․
Embroider, write with fabric markers, or print the information onto fusible interfacing and apply it to the fabric․
Hand-stitch the label to the back of the quilt, typically in a lower corner, ensuring it won’t interfere with the quilting or binding․
This adds a personal touch!

Tips for Success
Avoid solid black fabrics and use patterned whites sparingly for a more visually appealing crumb quilt․ Embrace randomness in color distribution!
Sorting scraps beforehand helps achieve balanced, yet unique, block designs․
Avoiding Solid Black Fabric
Solid black fabrics can sometimes get “lost” within the chaotic beauty of a crumb quilt, diminishing the vibrancy and visual interest of your design․
The small pieces can blend into shadows, creating holes or a less defined texture․
While a touch of dark shade is acceptable, it’s generally recommended to steer clear of large amounts of pure black․
Instead, opt for darker shades with some pattern or texture to maintain visual depth and prevent the quilt from appearing flat or disjointed․ This ensures a more cohesive and lively crumb quilt!
Using Patterned Whites Sparingly
Patterned whites, while seemingly neutral, can visually “compete” with the other colorful scraps in a crumb quilt, disrupting the overall harmony․
Busy patterns on white can create a distracting effect, making the quilt appear cluttered rather than charmingly scrappy․
It’s best to use white sparingly, and when you do, choose subtle patterns or textures․
Solid or lightly textured whites provide a cleaner backdrop, allowing the other fabric scraps to truly shine and create a balanced, visually appealing crumb quilt design․
Embracing Randomness in Color Distribution
The beauty of crumb quilting lies in its inherent randomness! Resist the urge to meticulously plan color placement within each block․
Sorting scraps by color before you begin, as suggested by A Rose Tinted World, helps achieve a more balanced, yet still unpredictable, distribution․
Allowing colors to mingle freely creates a dynamic and visually interesting texture․
Embrace the unexpected combinations – that’s where the unique charm of a crumb quilt truly comes alive, resulting in a wonderfully scrappy masterpiece!
Resources for Further Learning
Explore online tutorials from Missouri Star and YouTube for visual guidance․ Discover free patterns and connect with the supportive quilting community on Reddit (r/quilting)!
Online Tutorials (Missouri Star, YouTube)
Numerous online resources offer excellent crumb quilting tutorials, catering to all skill levels․ Missouri Star provides comprehensive video instruction, including Jenny Doan’s “Triple Play” series, showcasing three new crumb piecing quilt designs․
YouTube is also a treasure trove, with quilters sharing their techniques and project ideas․ These platforms visually demonstrate the process, from sorting scraps to piecing the “crumbs” onto foundation pieces․
Visual learners will greatly benefit from these step-by-step guides, gaining confidence and inspiration to create their own unique crumb quilts․ Don’t hesitate to explore various tutorials!
Free Crumb Quilt Patterns
Embarking on your first crumb quilt doesn’t require purchasing expensive patterns! I Love Quilting Forever highlights nine free patterns, including bonus options for sale, offering a diverse range of designs․
These patterns provide a structured starting point, guiding you through block layouts and quilt arrangements․ Many quilters also share their own designs online, fostering a collaborative community․
Beginners can start with simple block layouts, gradually progressing to more complex arrangements as their skills develop․ Free patterns are an excellent way to experiment and build confidence!
Reddit Quilting Community (r/quilting)
The r/quilting subreddit is a vibrant hub for quilters of all skill levels, offering invaluable support and inspiration for your crumb quilt journey․
Users frequently share their projects, ask questions, and provide constructive feedback, creating a welcoming environment for beginners․ A recent post showcased a quilter’s first finished quilt, a crumb design, expressing excitement and seeking advice․
This community is a fantastic resource for troubleshooting challenges, discovering new techniques, and connecting with fellow enthusiasts!
Inspiration and Project Ideas
Crumb quilts are versatile! Consider Christmas-themed designs, charming baby quilts, or larger bedding quilts, utilizing your fabric scraps creatively․
YouTube tutorials showcase diverse projects, sparking your imagination․
Christmas-Themed Crumb Quilts
Embrace the festive spirit by incorporating Christmas-themed fabrics into your crumb quilt! While avoiding solid black and patterned whites (as suggested by the r/quilting community), don’t hesitate to mix in holiday prints․
These quilts make wonderful gifts or cozy additions to your own holiday décor․
Imagine a crumb quilt featuring reds, greens, and golds, creating a warm and inviting texture․
Experiment with different block layouts – simple or complex – to showcase your unique style․ A Christmas crumb quilt is a delightful way to use up scraps and create a cherished heirloom․
Baby Quilts from Crumb Blocks
Crumb quilts are wonderfully soft and tactile, making them ideal for baby quilts! The randomized texture provides visual interest for little eyes, and the scrappy nature is forgiving for frequent washing․
Consider using a variety of pastel or gender-neutral fabrics for a sweet and comforting aesthetic․
Smaller block sizes can create a more manageable quilt for a baby’s crib or stroller․
Remember to prioritize soft, high-quality backing fabric for ultimate comfort, crafting a cherished keepsake for a new arrival․
Larger Quilts for Bedding
Creating a full-sized quilt from crumb blocks is a rewarding, albeit more ambitious, project! The texture of a crumb quilt adds incredible depth and visual interest to a bedroom․
Larger quilts benefit from careful color planning, even within the randomness of crumb quilting, to achieve a cohesive look․
Consider incorporating borders to frame the crumb blocks and define the quilt’s overall shape․
Straight-line quilting is a popular choice for larger quilts, enhancing the textural effect and providing stability․